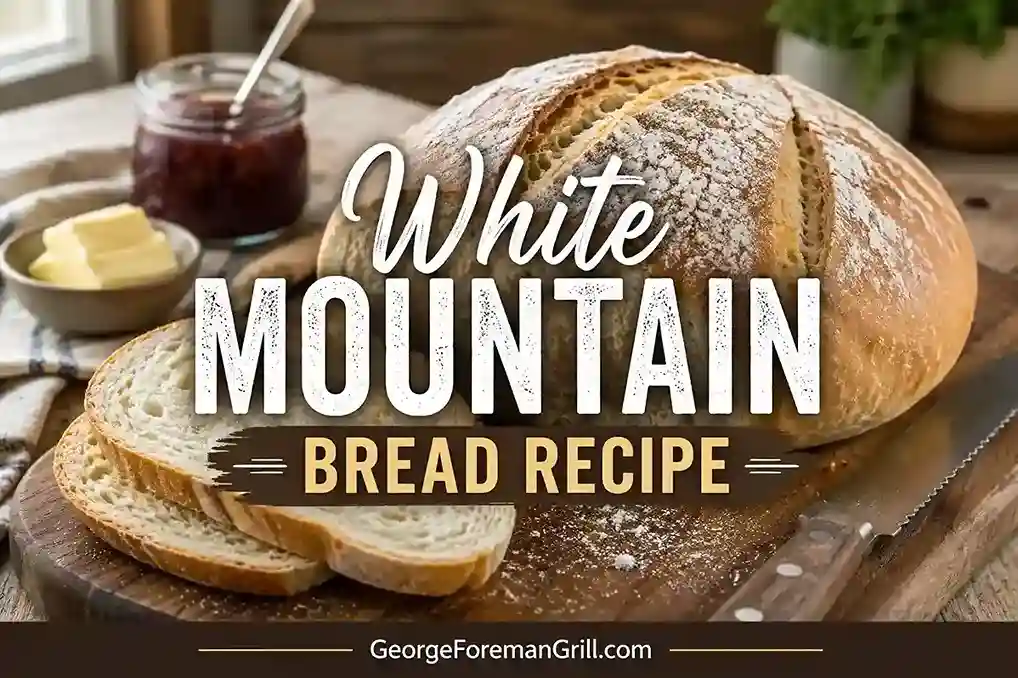
White Mountain Bread looks simple, but many home bakers struggle to copy its soft center, light sweetness, and flour-dusted crust. The dough may turn sticky, the loaf may spread sideways, or the inside may become dense instead of soft. Flour choice, yeast type, water temperature, kneading, and rising time can all change the final result.
This guide explains how to make a soft White Mountain Bread recipe inspired by Publix Mountain Bread. You will learn what this bread is, how it differs from regular white bread, which ingredients work best, and what equipment you actually need. Later sections will cover mixing, kneading, proofing, baking, common problems, storage, and frequently asked questions.
What Is White Mountain Bread?
White Mountain Bread is a round white yeast bread with a soft, moist center and a thin, lightly crisp crust. The top is usually dusted with flour, which gives the loaf its pale mountain-like appearance. The name is closely linked with Publix Mountain Bread, a popular bakery loaf sold in round form. It works well for sandwiches, toast, grilled cheese, French toast, and serving with soups.
Key Characteristics of White Mountain Bread
🍞 Round Boule Shape
Traditionally baked as a round, free-standing loaf rather than in a loaf pan.
🌨️ Flour-Dusted Top
A light coating of flour gives the loaf its signature white, mountain-like appearance.
🥖 Mild Flavor
Lightly sweet with a classic white bread taste that pairs well with both sweet and savory foods.
☁️ Soft Crumb
The inside stays soft, moist, and tender while remaining easy to slice.
🟤 Thin Golden Crust
A lightly crisp crust provides texture without becoming hard or chewy.
🥪 Great for Sandwiches
Strong enough to hold fillings while remaining soft enough for toast and everyday sandwiches.
It sits between soft sandwich bread and rustic artisan bread. It is softer than many bakery boules but has more crust and shape than a standard sliced white loaf.
Is White Mountain Bread the Same as Regular White Bread?
White Mountain Bread and regular white bread use many of the same basic ingredients. Both may contain white flour, yeast, salt, water, fat, and a small amount of sugar. The main differences are shape, crust, and texture.
White Mountain Bread vs Regular White Bread
Feature
🍞 White Mountain Bread
🍞 Regular White Bread
Shape
Round loaf
Rectangular loaf
Baking Pan
Often baked freely on a baking tray or baking stone
Usually baked in a loaf pan
Crust
Thin, lightly crisp, and dusted with flour
Soft and evenly browned
Crumb
Moist, soft, and lightly chewy
Fine, soft, and even
Best Use
Sandwiches, toast, soups, and dipping
Everyday sandwiches and toast
Regular sandwich bread often contains more fat, milk, or sugar. These ingredients create a very soft crust and fine crumb. White Mountain Bread usually keeps a more natural bread texture. It should still feel soft, but it should not feel as light or cake-like as packaged sandwich bread.
Is It the Same as Mountain Bread Flatbread?
Is White Mountain Bread the Same as Mountain Bread?
No. The name mountain bread can refer to different types of bread depending on where it is made.
🍞 Publix White Mountain Bread
Round yeast bread
Soft, fluffy center
Lightly floured crust
Thick slices
Ideal for sandwiches and toast
🌯 Australian Mountain Bread
Thin flatbread
Soft wrap-style texture
Similar to a tortilla or soft cracker
Made differently from yeast bread
Used for wraps and light meals
✔️ This Recipe Makes…
This recipe recreates the Publix-style White Mountain Bread—a thick, round yeast loaf with a soft crumb and lightly floured crust. It is not intended to make the thin Australian-style mountain flatbread.
Why You’ll Like This White Mountain Bread Recipe
Why You’ll Love This White Mountain Bread Recipe
🍞 Bakery-Style Results
Enjoy a soft, moist crumb with a thin, lightly floured crust that resembles Publix-style White Mountain Bread.
👨🍳 Beginner Friendly
Simple ingredients and easy-to-follow instructions make this recipe suitable for first-time bread bakers.
🥣 Flexible Mixing Methods
Make the dough by hand or with a stand mixer using the same reliable recipe.
🔥 Multiple Baking Options
Bake on a baking sheet for a softer crust or use a Dutch oven for extra oven spring and a crispier finish.
✅ Foolproof Tips
Learn visual dough cues and baking techniques that help prevent dense, sticky, or underbaked bread.
🥪 Perfect for Everyday Meals
Slice it for sandwiches, grilled cheese, toast, or French toast with a texture that holds up beautifully.
How This Recipe Compares With Publix White Mountain Bread
This is a homemade copycat recipe. It aims to match the main features people enjoy in Publix White Mountain Bread, but it is not the official Publix bakery formula. Commercial bakeries may use specific flour blends, dough conditioners, mixers, ovens, and production methods. These details can change how bread rises, stays soft, and browns. The goal of this recipe is to create a similar home-baked result using common ingredients.
Feature
Publix-Style Target
Homemade Result
Shape
Round and raised
Round boule
Top
Pale flour coating
Light flour dusting
Crust
Thin and lightly crisp
Soft to lightly crisp
Center
Moist and tender
Soft and even
Flavor
Mild and lightly sweet
Mild with gentle sweetness
Texture
Soft with light chew
Tender with enough structure
Best use
Sandwiches and toast
Sandwiches, toast, and grilled cheese
A baking sheet often produces a thinner crust that feels closer to soft bakery bread. A Dutch oven may create stronger oven rise, but it can also make the crust thicker and crisper. The best method depends on what you want. Use a baking sheet for a softer Publix-style crust. Use a Dutch oven if you prefer a taller loaf with more crust.
Ingredients
A good White Mountain Bread recipe depends on a balanced dough. Too much flour can make the bread dense. Too much water can make the loaf spread. Weak yeast can prevent proper rising.
White Mountain Bread Ingredients
🌾 Bread Flour
4 cups (500 g)
💧 Warm Water
1½ cups (360 ml)
🧂 Instant Yeast
2¼ teaspoons (1 packet)
🍯 Honey or Sugar
2 tablespoons
🧈 Butter or Neutral Oil
2 tablespoons, softened if using butter
🧂 Salt
1½ teaspoons
🌨️ Flour for Dusting
As needed for coating the loaf before baking
Ingredient Guide: What Each Ingredient Does
🌾 Bread Flour
Higher protein creates stronger gluten, giving the loaf better structure, more chew, improved oven spring, and a taller round shape. All-purpose flour also works but usually produces a softer, slightly lower loaf.
🧂 Yeast
Instant yeast mixes directly with the flour, while active dry yeast should be dissolved in warm water for 5–10 minutes. Always use fresh yeast for a reliable rise.
💧 Warm Water
Water hydrates the flour and activates the yeast. Aim for 100°F–110°F. Water needs may vary depending on flour, humidity, and room temperature, so add it gradually.
🍯 Sugar or Honey
Adds light sweetness while helping the crust brown. Honey also keeps the loaf moist but may brown faster during baking.
🧂 Salt
Balances flavor and slows yeast activity, helping the dough rise evenly and develop a better texture.
🧈 Butter or Oil
Adds richness and keeps the crumb soft. Butter gives more flavor, while neutral oils help the bread stay moist longer.
❄️ Flour for Dusting
Bread flour, all-purpose flour, rice flour, or a blend can be used. Rice flour creates the brightest white finish and helps achieve the classic White Mountain Bread look.
Bread Flour vs All-Purpose Flour
Choosing the Best Flour for White Mountain Bread
Both bread flour and all-purpose flour can make excellent White Mountain Bread, but each produces a slightly different texture and loaf shape.
🌾 Bread Flour
Higher protein creates stronger gluten, giving the loaf better structure, more oven spring, and a taller round shape with a light chew.
🥖 All-Purpose Flour
Produces a softer crumb and a slightly lower loaf. Start with 1–2 tablespoons less water because it absorbs less moisture.
⚖️ Half-and-Half Blend
Combines the strength of bread flour with the softness of all-purpose flour for a balanced loaf.
Can You Substitute All-Purpose Flour?
Yes. Use the same weight of flour, but begin with 1–2 tablespoons less water. Mix the dough first, then add extra water only if it feels dry or stiff. The finished dough should be soft and slightly tacky, not runny or sticky like paste.
Can You Mix the Two Flours?
Absolutely. A 50/50 blend offers:
Better loaf shape
Softer crumb
Easier dough handling
Light chew without toughness
⭐ Best Choice
Choose bread flour for the tallest, bakery-style round loaf. If you only have all-purpose flour, you’ll still get excellent results with a slight reduction in water. A 50/50 blend is a great middle ground for a soft loaf that keeps its shape.
Equipment
You do not need a fully equipped bakery to make White Mountain Bread.
Essential Equipment for White Mountain Bread
🥣 Large Mixing Bowl
For combining and mixing all of the dough ingredients.
🥄 Measuring Cups & Spoons
Measure ingredients accurately if you’re not using a kitchen scale.
⚖️ Kitchen Scale
The most accurate way to measure flour and achieve consistent results.
🥄 Dough Scraper or Wooden Spoon
Helps mix, scrape, and handle sticky dough more easily.
⚙️ Stand Mixer (Optional)
A dough hook makes kneading easier but is not required.
🍞 Baking Surface
Use a baking sheet, baking stone, or Dutch oven depending on your preferred crust.
📄 Parchment Paper
Prevents sticking and makes transferring the dough easier.
🔪 Bread Lame or Sharp Knife
Used to score the loaf so it expands properly during baking.
🧺 Clean Kitchen Towel
Covers the dough during proofing and lines bowls used instead of a banneton.
🌬️ Cooling Rack
Allows air to circulate so the loaf cools evenly without becoming soggy.
🌡️ Instant-Read Thermometer
Confirms the bread is fully baked when the center reaches 195°F–205°F.
A kitchen scale gives more reliable results than cup measurements. Flour can become packed inside a measuring cup, which may add too much flour and make the bread dry.
What to Use Instead of a Banneton
No Banneton? Try These Easy Alternatives
A banneton helps shaped dough keep its round form during the final rise, but you can achieve excellent results using common kitchen items.
🥣 Medium Mixing Bowl
A simple bowl lined with a floured towel provides excellent support for round dough.
🥗 Colander
The curved shape supports the dough while allowing good airflow during proofing.
🧺 Food-Safe Basket
Any clean, round basket lined with a towel works as a homemade proofing basket.
🥣 Small Salad Bowl
A deep salad bowl is another easy option for maintaining the loaf’s round shape.
✔️ Best Setup
Line your container with a smooth, clean kitchen towel and dust it generously with rice flour, bread flour, or a mixture of both. Avoid thick terry towels because the dough can stick to the fabric loops.
🥖 Before Baking
Place the shaped dough seam-side up in the prepared container. After proofing, gently turn it onto parchment paper, score the top, and bake as directed.
Do You Need a Dutch Oven?
Which Baking Method Should You Choose?
🍲 Dutch Oven
Traps steam around the loaf, creating excellent oven spring and a taller loaf with a crisp, artisan-style crust.
🥖 Baking Sheet
Allows moisture to escape sooner, producing a thinner, softer crust that’s closer to Publix-style White Mountain Bread.
🪨 Baking Stone
Provides steady bottom heat for even baking with a balanced crust and good overall texture.
🍞 Loaf Pan
Produces a classic sandwich loaf with soft sides and evenly shaped slices for everyday use.
Quick Recommendation
Choose a baking sheet or baking stone if you want a softer crust similar to Publix White Mountain Bread. Use a Dutch oven if you prefer a taller artisan-style loaf with a crisp crust.
💡 Extra Tip
If you’re not using a Dutch oven, place a small heat-safe pan of hot water on the lower oven rack during the first part of baking. The added steam can improve oven spring without fully enclosing the loaf. Open the oven carefully, as hot steam can cause burns.
How to Make Publix-Style White Mountain Bread
Making homemade White Mountain Bread is easier than many people think. The most important part is paying attention to how the dough looks and feels instead of watching the clock. Rise times can change depending on your kitchen temperature, flour, and yeast. Use the visual signs in each step to decide when to move forward.
How to Make White Mountain Bread
1. Mix the Dough
Ingredients
4 cups (500 g) bread flour
1½ cups (360 ml) warm water
2¼ teaspoons instant yeast
2 tablespoons honey or sugar
2 tablespoons softened butter or neutral oil
1½ teaspoons salt
What to Do
Mix the flour, yeast, sweetener, and salt. Add the warm water and butter or oil. Stir until no dry flour remains.
Dough check: It should look rough and slightly sticky. Add water one tablespoon at a time if dry, or a small amount of flour if it resembles thick batter.
2. Knead the Dough
Use a stand mixer on low for 8–10 minutes, or knead by hand for 10–12 minutes.
Hand-Kneading Method
Fold the dough over itself.
Push it away with the heel of your hand.
Turn it slightly.
Repeat until smooth.
Ready when: The dough feels soft, slightly tacky, elastic, and able to hold its shape.
3. Check the Gluten
Windowpane Test
Pinch off a small piece of dough and stretch it slowly. It should form a thin, almost transparent sheet before tearing.
If it tears quickly: Knead for another 1–2 minutes, then test again.
4. First Rise
Shape the dough into a ball and place it in a lightly greased bowl. Cover and leave it in a warm place for about 60–90 minutes.
Look for These Signs
Nearly doubled in size
Puffy appearance
Small bubbles under the surface
A cool kitchen may require extra rising time. Watch the dough rather than relying only on the clock.
5. Shape the Loaf
Turn the dough onto a clean surface.
Gently press out very large air pockets.
Fold the outer edges toward the center.
Turn the dough over.
Cup your hands around it and pull it toward you several times.
Why it matters: A tight outer surface helps the loaf rise upward instead of spreading sideways.
6. Second Rise
Place the dough seam-side up in a floured banneton or towel-lined bowl. Cover and proof for about 30–60 minutes.
Finger-Dent Test
Press one finger about ½ inch into the dough.
Slow return: Ready to bake
Fast spring-back: Needs more time
No movement: May be over-proofed
7. Dust and Score
Turn the loaf onto parchment paper, lightly dust the top with flour, and cut one deep slash or a simple cross.
Scoring Depth
Cut about ¼ to ½ inch deep using a sharp knife or bread lame.
Rice flour gives the brightest white finish. Scoring helps the loaf expand without cracking in random places.
8. Bake the Bread
Preheat the oven to 425°F (220°C). Bake for 30–35 minutes.
Doneness Signs
Golden-brown crust
Firm exterior
Lightly crisp surface
Hollow sound when tapped underneath
Internal temperature: 195°F–205°F (90°C–96°C).
9. Cool Before Slicing
Transfer the loaf to a cooling rack and wait at least 1 hour before cutting.
Why Cooling Matters
The crumb continues setting after the loaf leaves the oven. Cutting too early releases steam and may create a gummy center.
Early slicing can cause sticky crumbs, squashed slices, and an undercooked texture.
What Should the Dough Look and Feel Like?
Many recipes tell you exactly how long to mix or rise the dough. That works only if every kitchen has the same temperature and humidity. Instead, use these visual cues.
Dough Texture Guide
1. After Mixing
The dough looks rough and feels slightly sticky, with no dry flour left in the bowl.
2. After Kneading
The dough becomes smooth, elastic, and slightly tacky without feeling wet like batter.
3. After First Rise
The dough looks puffy, holds small air bubbles, and grows close to twice its original size.
4. After Shaping
The surface looks smooth and tight, with enough tension to help the loaf rise upward.
5. Ready to Bake
A light finger press returns slowly while leaving a small dent in the dough.
These signs are usually more reliable than following the clock.
Best Tips for Baking White Mountain Bread
Best Tips for Soft White Mountain Bread
Measure Flour by Weight
A kitchen scale is more accurate than measuring cups. Too much flour is a common cause of dense bread.
Keep the Dough Slightly Tacky
Soft dough usually makes softer bread. A little sticking is normal and does not always mean the dough is too wet.
Watch the Dough, Not the Clock
Warm kitchens shorten proofing, while cool kitchens slow the rise. Use the dough’s size and texture as your guide.
Create Surface Tension
A tight outer surface helps the loaf rise upward. Loose shaping can make the dough spread sideways.
Fully Preheat the Oven
Preheat for 20–30 minutes. A properly heated oven improves oven spring and helps the loaf hold its shape.
Use a Thermometer
Crust color alone cannot confirm doneness. Check that the center reaches 195°F–205°F.
Cool Completely
Wait at least 1 hour before slicing. Cooling improves the crumb, moisture balance, and slice quality.
Dutch Oven vs Baking Sheet
Both methods work well. Choose the one that matches the bread you want.
Dutch Oven vs Baking Sheet
🍲 Dutch Oven
A Dutch oven traps steam during baking, delaying crust formation so the dough has more time to expand.
Taller loaf
Better oven spring
Thicker, crispier crust
More artisan-style finish
🥖 Baking Sheet
A baking sheet allows moisture to escape earlier, creating a thinner and softer crust.
Thinner crust
Softer texture
Easy everyday baking
Closer to Publix-style bread
Quick Recommendation
Choose a Dutch oven if you prefer a taller, artisan-style loaf with a crisp crust. Choose a baking sheet if you want a softer crust and a texture that’s closer to Publix White Mountain Bread.
Common White Mountain Bread Problems
Even experienced bakers occasionally make mistakes. Most bread problems have simple causes.
White Mountain Bread Troubleshooting
Dense Loaf
Often caused by too much flour or a short rise. Weigh the flour and let the dough become puffy.
Dough Did Not Rise
Check the yeast date and water temperature. A cool room may also require more rising time.
Loaf Spread Sideways
The dough may be too wet, loosely shaped, or over-proofed. Create a tighter outer surface.
Gummy Center
Bake until the center reaches 195°F to 205°F, then cool the loaf for at least one hour.
Hard Crust
Reduce steam and avoid overbaking. A baking sheet usually gives a thinner, softer crust.
Dry Bread
Extra flour or long baking can remove too much moisture. Keep the dough slightly tacky.
Learning from these problems improves every loaf. Bread baking becomes easier with practice.
How to Know When White Mountain Bread Is Done
How to Tell When White Mountain Bread Is Done
Don’t rely on baking time alone. Check several signs together to know when your bread is fully baked and ready to come out of the oven.
🥖 Golden Crust
The outside should be evenly golden brown with no pale or doughy-looking areas.
👆 Firm Texture
The loaf should feel firm and spring back lightly when gently pressed.
🔊 Hollow Sound
Tap the bottom of the loaf. A hollow sound is a good sign that the bread is baked through.
🌡️ Internal Temperature
The center should reach 195°F–205°F (90°C–96°C) when checked with an instant-read thermometer.
🍞 Holds Its Shape
Once removed from the oven, the loaf should stay tall and not collapse as it cools.
⏳ Let It Cool First
Resist the urge to slice the bread immediately. The crumb continues to set as it cools. For the best texture and cleaner slices, let the loaf cool on a wire rack for at least 1 hour.
✅ Quick Baking Checklist
Golden brown crust
Hollow sound when tapped
Internal temperature of 195°F–205°F
Firm sides and well-shaped loaf
Cooling rack ready before slicing
Serving Ideas
White Mountain Bread is a versatile loaf that works for breakfast, lunch, dinner, and snacks. Its soft crumb and mild flavor pair well with both sweet and savory toppings.
Delicious Ways to Serve White Mountain Bread
🍓 Sweet Breakfast
Enjoy with butter and fruit jam, honey, or peanut butter for a simple morning meal.
🥑 Healthy Toast
Top toasted slices with avocado and fried or scrambled eggs for a filling breakfast.
🥪 Sandwiches
Perfect for chicken salad, tuna salad, turkey, or ham sandwiches thanks to its soft yet sturdy crumb.
🧀 Grilled Cheese
Makes crispy, golden grilled cheese sandwiches with a soft center, especially on a George Foreman Grill.
🧄 Garlic Bread
Spread with garlic butter and toast until lightly crisp for an easy side dish.
🍲 Soups & Stews
Serve alongside tomato soup, beef stew, or chili to soak up every flavorful bite.
If you own a George Foreman Grill, this bread is excellent for grilled cheese sandwiches, panini, and pressed sandwiches because the soft crumb crisps nicely without becoming too hard.
Storage, Freezing, and Reheating
Homemade bread contains fewer preservatives than store-bought bread, so proper storage helps keep it fresh.
Storage, Freezing & Reheating Guide
🥖 Store at Room Temperature
Allow the loaf to cool completely before storing.
Bread box
Paper bag inside a plastic bag
Airtight bread bag
Storage Time:
2–3 days at room temperature.
Avoid refrigerating the bread unless necessary, as refrigeration can make it stale more quickly.
❄️ Freeze for Longer Storage
White Mountain Bread freezes well.
Whole loaf
Half loaf
Individual slices
Wrap tightly in plastic wrap or foil, then place it inside a freezer-safe bag and label it with the date.
Best Quality:
Use within 3 months.
Thaw the whole loaf at room temperature, or toast frozen slices directly from the freezer.
🔥 Reheat Before Serving
Whole Loaf
Preheat oven to 325°F (163°C)
Wrap loosely in foil
Heat for 10–15 minutes
Individual Slices
Toast in a toaster
Warm in a skillet
Toast on a George Foreman Grill for a lightly crisp crust
Tip:
Avoid overheating, as it can dry out the bread.
Make-Ahead and Overnight Instructions
Make White Mountain Bread Dough Ahead of Time
Preparing the dough the day before makes homemade bread easier to fit into a busy schedule. An overnight rise in the refrigerator also helps develop a deeper flavor.
🌙 Overnight Refrigeration
Knead the dough.
Place it in a lightly greased bowl.
Cover the bowl tightly.
Refrigerate overnight.
❄️ Why Chill the Dough?
Cold temperatures slow the yeast, giving the dough more time to develop flavor while making the baking schedule more flexible.
🌤️ The Next Day
Remove the dough from the refrigerator.
Let it rest at room temperature for 45–90 minutes.
Shape the loaf.
Complete the second rise.
Bake as directed.
💡 Helpful Tip
Dough coming straight from the refrigerator is colder than freshly mixed dough, so it usually needs a little extra proofing time before baking. Wait until it becomes slightly puffy before placing it in the oven.
FAQs
The exact origin of the name is not officially documented. Most people believe it refers to the loaf’s rounded shape and flour-dusted white top, which resembles a snow-covered mountain.
Yes. All-purpose flour produces a slightly softer loaf with a little less height. Bread flour generally creates stronger gluten and better oven spring.
Yes. A baking sheet or baking stone works very well. Many home bakers prefer these methods because they create a thinner crust that is closer to the texture of Publix Mountain Bread.
Yes. Simply dissolve it in warm water before mixing the dough. Rise times may vary slightly compared with instant yeast.
Yes. Refrigerating the dough overnight is a great option. The slower rise develops more flavor while giving you more flexibility the next day.
Conclusion
Making a soft White Mountain Bread recipe at home is easier when you focus on the dough instead of simply following a timer. Small details such as using the right flour, building surface tension, checking the dough with the finger-dent test, and confirming the final internal temperature make a big difference. With a little practice, you can bake a loaf that is soft, flavorful, and well suited for sandwiches, toast, or grilled meals while enjoying fresh homemade bread whenever you want.